 There is no better expression of love than a good episode of The Simpsons. Watched together, on the couch, with two big bowls of pasta and maybe a furry kitty between you. It’s what we did the first night we moved into our very own apartment together, just the two of us, four years ago, taking those tiny but bold steps towards something bigger and lasting. Whenever we’re blue, or distraught, or maybe just watched something too intensely depressing, we turn to The Simpsons — together. We re-watch scenes over and over, noticing tiny details that we hadn’t caught the first 38 times around. We double over in laughter. We quote Mr. Burns, Grampa, Marge, Homer, Ralph Wiggum, everyone. And it never, ever gets old. That’s love, right?
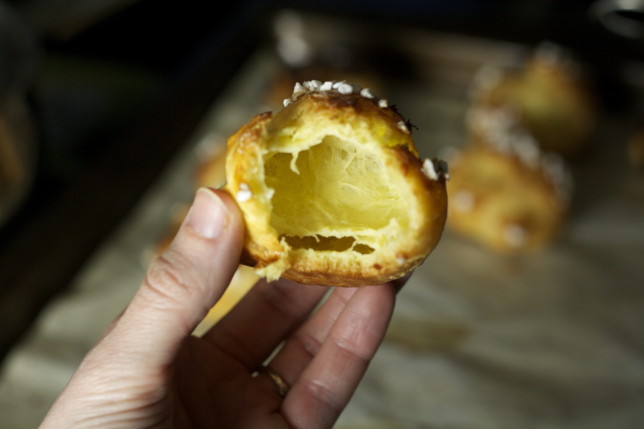
Love is also made of pastry. Candies and chocolates are great. So are brownies, and cookies, and cakes. But sometimes — like maybe on Valentine’s Day — you want to do something extra special. Something that maybe doesn’t take a whole lot of work, but is French, and is, as such, fancy, and instantly impressive. I’m talking about choux pastry — pâte à choux. That gorgeously crisp pastry dough that puffs up in the oven, leaving a just barely custardy space inside for pastry cream, or whipped cream, or ice cream, or nothing at all. I’m talking profiteroles, I’m talking eclairs. But first, I’m talking chouquettes.
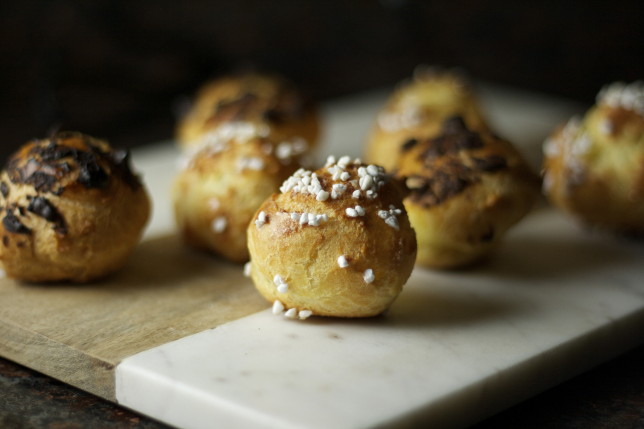
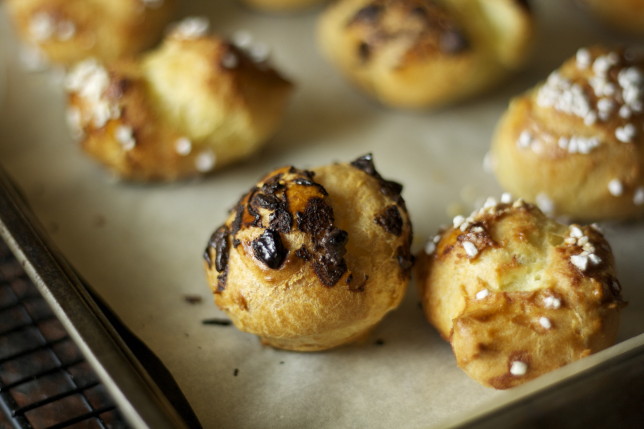
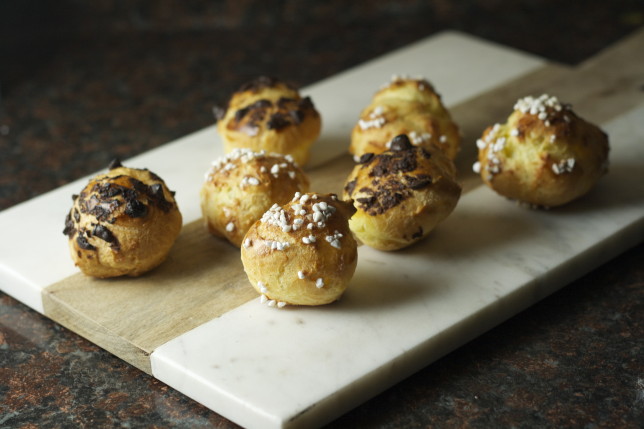
Chouquettes are two-bite, mid-afternoon snacks, aimed to soothe a sweet-tooth. They traditionally crunch from the topping of pearl sugar, giving way to a pillow of nothingness, which is all the more lovely when you realize that hollow center is surrounded by something tantalizingly tender. It’s layers of tricks to play on your tongue.
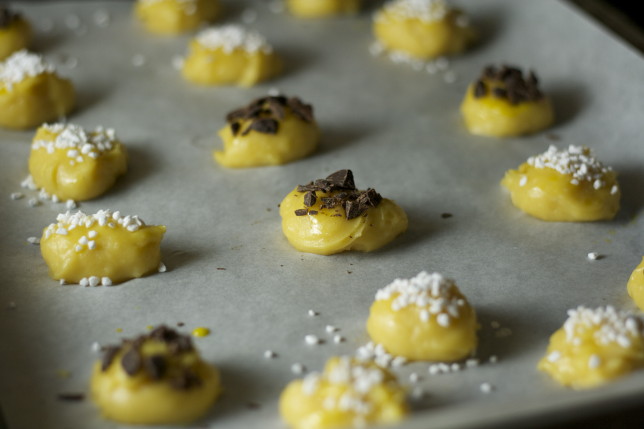
They are also deceptively simple. Choux pastry is made in a pot, and only one, and it begins over a burner. Butter is melted with water, a smidge of sugar and salt. It’s then taken off the heat and flour is dumped in. It’s stirred vigorously until it looks like, well, dough. It’s then left to rest for a few minutes before eggs are added, one by one. It’s then piped or dropped by the spoonful, brushed with egg wash and smothered in those pearl sugar crystals, or, if you’re daring, chopped chocolate, and baked at high heat until the liquid in the dough evaporates and they rise and puff, creating a crackling exterior.
The first time I made them, I left the dough too wet. It was more like batter. They barely puffed in the oven — which was probably also due to the fact that I opened the oven door — twice. A serious no-no. They were still delicious: I brought them to a party and my friends couldn’t stop eating them. But the next time, I was patient. I didn’t stop stirring too soon, or too vigorously. This batch rose and hollowed like nothing I’d ever seen before in my own oven.
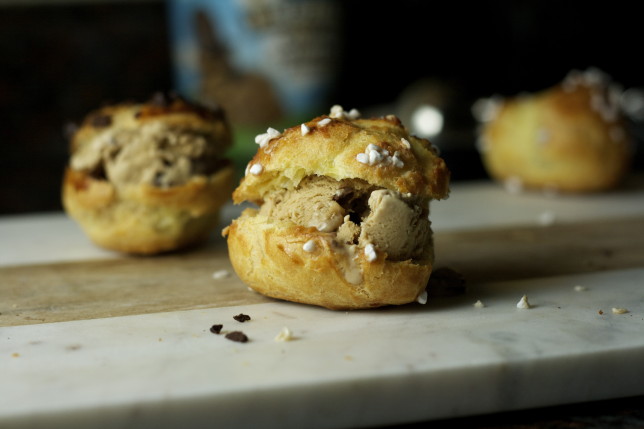
They are, in a word, delightful. For an even more indulgent dessert, I cut a few open and dropped in small scoops of ice cream — whole new level of love.
Chouquettes are going to be a staple in our home. I never knew anything this seemingly fancy could be so simple. Fifteen minutes of work for something like this? And if you make them for Valentine’s Day, you can include a handmade card that says something like, oh, I don’t know… “I choux-choux-choose you.”
That’s love.
Chouquettes
barely adapted from David Lebovitz
My biggest piece of advice for getting this lovely dough right is simply patience. Get all your ingredients ready before you begin — measure out your flour, make sure your eggs are at room temperature (leave them in a bowl of warm water if you, like me, never ever remember until the last minute) and cracked. The stirring worked best for me with a silicone spatula, and boy did I stir. When it worked, it took less time than I thought it would, but I kept stirring to make sure as much moisture evaporated as possible before I let it cool for a moment and added the eggs. And about those eggs: adding them one at a time allows you to gauge the consistency of the dough while you’re working. You may find that you only need three eggs rather than all four — and that’s okay. The dough will be kind of silky — stiff, but barely batter-like. Be patient in your assessment. And if it’s too wet, seriously, just call them cookies. The flavor — and texture — is still incredible.
You can find pearl sugar online and in stores like Whole Foods, which is where I bought mine. Certainly not necessary (the chocolate topping is fantastic), but a really wonderful, and traditional, addition.
This recipe is easily doubled or halved.
Makes about 32 puffs, give or take
1 cup (250 mL) water
½ teaspoon salt
2 teaspoons sugar
6 tablespoons (90 grams) unsalted butter, cut into small chunks
1 cup (135 grams) flour
4 large eggs, at room temperature
1 egg yolk plus 1 tablespoon milk, for glaze
Pearl sugar, crystal sugar, or chopped chocolate (or mini chocolate chips), for topping
Preheat oven to 425 degrees with an oven rack in the center. Line a baking sheet with parchment or a silicone baking mat.
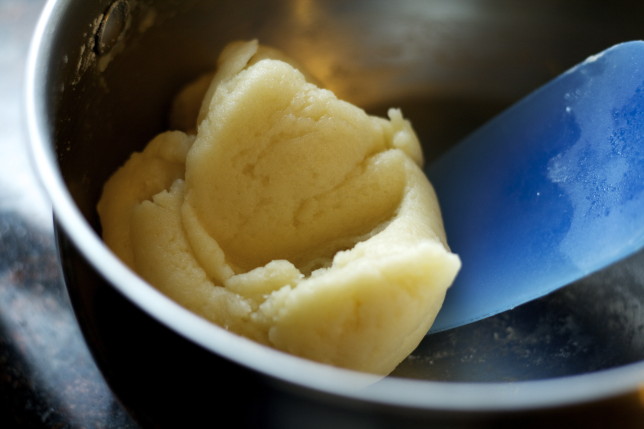
Heat the water, salt, sugar, and butter in a medium saucepan, stirring until the butter is melted. Remove from heat and immediately dump in the flour all at once. Immediately begin stirring vigorously until the mixture pulls away from the sides of the pot into a smooth ball. Allow to cool for 3-5 minutes.
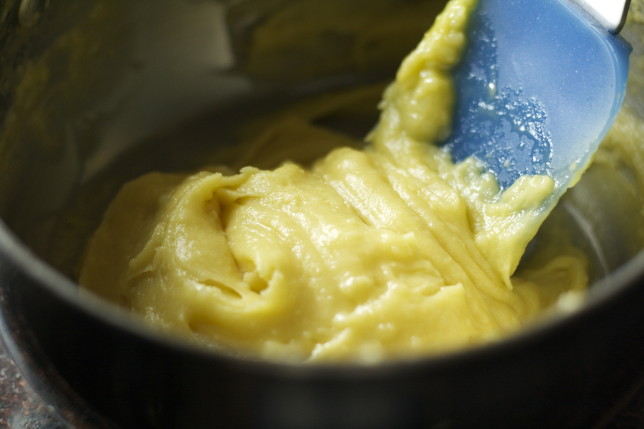
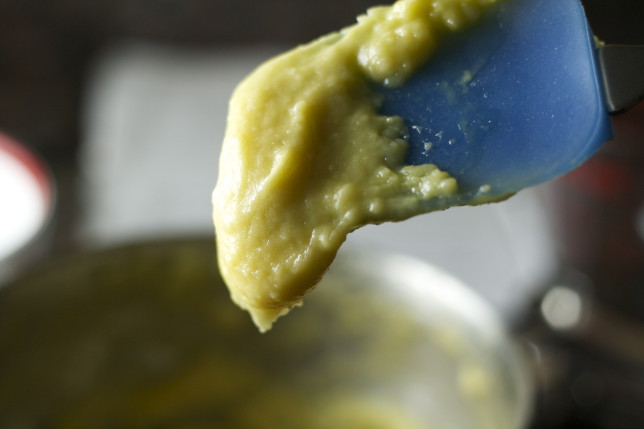
Beat in the eggs, one at a time, until the mixture is smooth and shiny. It should hold its shape when scooped but still slide back into the pot when released. You may only need three eggs, or you may end up using all four.
Using two spoons, a spring-loaded cookie scoop, or a pastry bag with a fairly wide tip, portion the dough out into small mounds. I used a heaping teaspoon (the kind you stir your coffee with) for mine. Leave enough space for the dough to expand a bit. If it’s the right consistency, though, they should mostly just rise.
Brush the top of each mound with the egg glaze and sprinkle with sugar or chocolate, pressing very gently until they are very well-covered.
Bake until the chouquettes are puffed and golden brown, about 25 to 30 minutes. DO NOT OPEN THE OVEN DOOR. Just turn on the light to take a peek. If they seem to be getting too dark midway through, reduce the oven temperature to 375 degrees.
They are best eaten warm or at room temperature, and on the same day they’re baked. Once cooled, slice them open and fill with a small scoop of your favorite ice cream.
Cooled chouquettes can also be stored in a zippered bag in the freezer for up to one month. Defrost them at room temperature and then bring them back to life in the oven at a moderate temperature.


Thankfully, Rachel Khoo s recipe was as straightforward as choux pastry is supposed to be. These chouquettes were light and crisp, and disappeared within seconds of being served. They are best served on the day they are made, but they are so moreish that you need not worry about leftovers.
It’s a very similar recipe! What I love about it is there’s no need for a stand mixer — everything done by hand.